13 minute read time
4 Email Campaigns Your Nonprofit Needs To Automate
This is a guest post by Sarah Henry and Lauren Uhl at Elevation Web.
As a nonprofit organization, time is one of your most valuable resources. Where can you save time without cutting corners or potentially losing out on donations? The solution that’ll save you hours while driving even more donations is this: email automation.
Dedicated email follow-ups (e.g. confirmations after a visitor submits a form) and welcome emails are types of automated emails.
With email automation, long gone are the days of sending out manual emails asking for feedback or trying to keep track of recent donors to send updates about their donations. These one-off follow-up emails can become major drives for building your community, but they’re virtually impossible to do alone. Luckily, automation provides the best of both worlds.
Read on to discover several email campaigns your nonprofit needs to automate. Each email heading can serve as a potential subject line. You’ll also find options for areas to personalize and the suggested delay before each send.
Learn about nonprofit email metrics here.
First-time donor: retention sequence
Whether it’s a birthday, graduation, or a holiday gift, what’s the first thing you do when someone gives you money? You say, “Thank you.” Think of nonprofit donations in a similar way.
Here are the steps to creating your first-time donor follow-up sequence.
1. Your donation has been received.
Directly following the donation, donors are eager to ensure the payment went through properly. Ease their nerves and excitement by sending a follow-up email with a payment confirmation. This email should include a few important things:
- A receipt. This will be used for the donor’s tax purposes. Make sure this includes their information, how much they donated, and all the legal information needed.
- A “Thank you.” Subscribers will appreciate this human courtesy, and you can never say thank you too many times.
- Tax purposes. Generally speaking, as a 501(c)(3) organization, donations made on your behalf are tax deductible for the donor. You might include in your email that no goods or services were exchanged for their contribution and that their gift is tax deductible to the full extent of the law. You might also include that you’re a 501(c)(3) corporation and your federal tax identification number. Often, donors like to keep this letter for their records. Ensure you’re delivering all necessary information on this receipt so your donors don’t have any trouble in the future.
- Matching opportunities. Let’s double or triple the donation. Ask your donors to reach out to their HR department to find out if their company matches gifts.
Time to send: immediately after payment is confirmed.
Personalization options: include their name. You’ll also need to include the personalized receipt with all of their information and the specific amount donated.
2. Thank you for your support.
A day or two later, send a personalized thank you note. This is an opportunity to provide some human connection to your follow-up. Take the time to write a thorough thank you message, including the following information:
- Tell the story behind why the nonprofit came to be. Talk about the struggle, the inspiration, the change that’s already taken place by the work of your nonprofit.
- Include a photo or two of the team and the work you do onsite. Remember, make sure this email comes from a real email address that can be responded to.
- Remember, this is not an opportunity to ask for more donations. Allow them to bask in the satisfaction that they contributed to your nonprofit before asking them for more. By giving them time to reflect on their contribution, they’ll feel more inclined to donate more later, but not likely immediately after.
- Discuss where their donations went. Be specific. A good CTA to include in this section might invite the donor to learn more about your nonprofit’s work behind the scenes and work in the field. Include a link to your impact report or case studies.
Time to send: one or two days following email #1.
Personalization options: their name, amount donated, what your organization can do with that amount of money, who the letter came from (if they donated for a specific campaign), and the person they donated on behalf of.
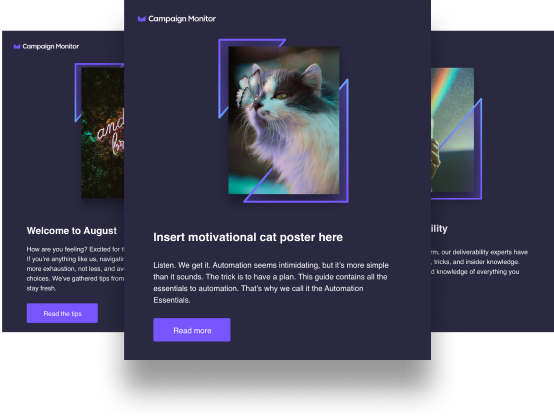
3. More ways to get involved
You can send your next follow-up email featuring other ways to get involved in your organization. Include pictures, bold headings, and eye-catching CTAs directing readers to relevant information and pages. Options can often include:
- Volunteer opportunities
- Upcoming events for their location nearby
- Signup options for your newsletter or blog
- Educational resources
- Social media following suggestions. If they already follow you on Twitter and are signed up for your email newsletter, your CRM might track this, and you can acknowledge this in the email as well.
- Ask with the last email, don’t ask for more donations.

Source: Really Good Emails
Time to send: a week following email #2.
Personalization tips: their name, ways they’re already involved.
4. With your help, we…
After the donation goes through, it’s time to share where that money went. A campaign summary is the way to show your donors how their donation changed the world.
This email should be adjusted every so often, based on the performance of your campaigns and state of your nonprofit. In the email, you’ll want to include the following information:
- People/efforts the campaign donation helped
- The supplies purchased
- A story of someone whose life has changed because of the campaign donation
- You can also include whether or not you achieved your goal or if you need more help.
- If needed, it’s okay to ask for more donations at this time.
Time to send: after the general amount of time it takes your nonprofit to finish a campaign.
Personalization tips: their name, the amount donated, the specific effect that amount had on your mission.
Returning donor sequence
The process for returning donors is going to be a little different. They’ve shown further interest in supporting your nonprofit, so the potential for becoming a long-term supporter is there. Here’s how you can nurture your loyal donors, so they stay actively involved.
1. Your donation has been received.
As always, the first follow-up email is going to include the receipt and confirmation that the payment was successful. Refer above for how to write this initial email.
Time to send: immediately after payment is confirmed.
Personalization options: include their name. You’ll also need to include the personalized receipt with all of their information and the specific amount donated.
2. Thank you for your dedicated support.
This email will be different than the initial thank you sent out the first time they donated. Write something short, sweet, and personalized.
- Start by thanking them for their ongoing support.
- Mention the impact their donations have made.
- Acknowledge their support and encourage them to share it with their friends. Your CRM should keep track of the ways they are involved, so use this information to personalize your email as much as you can.
This is also an opportunity to find out if they’re interested in turning their donation into a monthly gift. Explain how it works, and include in the email a CTA or box for them to sign up right there.
Time to send: a day or two following email #1.
Personalization tips: how much they’ve donated in total, the impact that amount of money has on the organization, ways they’re already involved with your organization.
3. With your help, we…
As always, send a follow-up down the line with a campaign summary. This email must be different than the one they received in their first campaign, but you can follow the same basic guidelines when creating this email.
Time to send: after the general amount of time it takes your nonprofit to finish a campaign.
Personalization tips: their name, the amount donated, the specific effect that amount had on your mission.

Source: Really Good Emails
Event correspondence
No matter the event, this checklist is a good place to start.
1. Registration confirmation
This email will detail everything that they signed up for, along with their confirmation number, location, date, time, and description of the event. If it was a paid event, make sure to include the payment receipt and confirmation too.
The rest of the email should share more details of what the event entails.
- If their signing up requires them to make a donation, include the commitment they made.
- If you have a referral program to invite their friends, include a description of how it works and their referral code.
- Encourage them to follow you on social channels/sign up for your newsletter.
Time to send: immediately following registration confirmation.
Personalization tips: name, confirmation number, what they signed up for, personalized referral code.

Source: Really Good Emails
2. Know before you go
In the days, weeks, or months leading up to the event, you’ll want to send email reminders and information to your audience. Keep track of your donors fundraising efforts and provide resources if they’re falling behind. You may just need to send one or two reminders of location and date and specific things they need to remember.
These emails also offer an opportunity to further encourage your participants to invite their friends or even start a team (if applicable).
Time to send: varies leading up to the event.
Personalization tips: their name and their fundraising progress.
3. We’re so excited for tomorrow!
As always, make sure to send a reminder email in the days leading up to the event. Include only necessary information they’ll need: location, date, time, transportation, parking instructions, their ticket or confirmation number, reminders, etc. Attach a last-minute note to get everyone excited.
Time to send: a day or so before the event.
Personalization tips: their name and confirmation number.
3. Thank you for joining us | [event] recap
Following an event is a special moment for your participants. They’ve just dedicated a significant amount of time and energy into you and your organization. This email is an opportunity to prolong that excitement and further inform about your future events.
- Start by thanking your guests for joining.
- Next, include a short recap of everything you achieved (i.e., how much money was fundraised, how many people participated, how many people you reached online, some highlights and stories from the event, etc.).
- Share a link to a photo gallery or wrap-up video and encourage your participants to share these with their communities.
- Include easy-to-share images and graphics and Thank You templates for your participants to thank those who supported them or donated money on their behalf.
Time to send: within a day of the event.
Personalization tips: their name and how much money they raised/miles they walked/whatever is applicable.
4. We want your feedback.
It’s time to hear about the experience from those who actually participated. Send feedback request forms days following the event when everything is still fresh in their mind.
Time to send: within a few days following the event.
Personalization tips: their name.
Volunteer onboarding
If your organization utilizes volunteers, writing onboarding emails for each new class/individual registrant can be quite time consuming. Here’s one way to automate this onboarding process and optimize volunteer participation:
1. Your application has been received.
If your organization has a screening process/application process for your volunteers, send out a Thank you for applying; we’ve received your application confirmation. Include next steps here too.
Time to send: immediately following their application submission.
Personalization tips: name, confirmation number, date they’ll hear back.
2. Welcome to [Organization].
Once a volunteer has been accepted, the first thing you want to send is a welcome email. They’re a part of your organization, a part of your team, so treat them this way. This email should include the orientation packet and what the next steps will look like.
Time to send: following their acceptance.
Personalization tips: their name, position, location/branch.
3. Our vision with your help
This email will describe how these volunteers fit in within your vision. It’ll help generate excitement and inspiration for your volunteers.
Time to send: two days following their acceptance
Personalization tips: their name, their position, how their position impacts the community.
4. Meet your new team/community.
Whether it’s a meet up with fellow volunteers or a Facebook group to join, send a link to your new volunteer and invite them to introduce themselves to the team. Include pictures, videos, or stories about past volunteers to get your new volunteers excited for this new venture.
Time to send: about a week following email #3.
Personalization tips: their name.
5. Need help getting started?
If some volunteers haven’t initiated their service yet, tie in a check-in email. Include easy-to-follow CTAs and links, and be clear about the ways they can start their journey with your nonprofit.
Time to send: two weeks following email #4.
Personalization tips: their name, opportunities in their community.
6. We want your feedback.
Your nonprofit only improves if your volunteers/participants are honest; that’s why it’s of the utmost importance you foster authentic opportunities for volunteers to offer feedback. Whether it be through anonymous surveys or phone calls, you want to make this a priority.
Review our nonprofit email guide to learn about various types of nonprofit emails and benchmarks you should be aiming for.
Time to send: following their participation in any event.
Personalization tips: their name, the event they attended.

Future campaigns
Be sure you’re optimally utilizing your Google Ad Grant so your new leads are being directed to the right places. Email automation is only as relevant as the audience your emails reach. By optimizing your Google Ad Grant to yield as many constituents as possible, you’ll be able to focus your attention more on retention than on attraction.
Personalization
Whichever email software you’re using, make sure it has proper personalization abilities and integrates with your donor management software (or CRM). Keep track of this important data and insert key phrases into your emails.
Wrap up
While it would be ideal to personally engage with constituents every step of the way, you can still generate excitement and inspiration toward your cause through intentional email automation.
By utilizing these guidelines and knowing which email campaigns your nonprofit needs to automate, you can transcend the virtual limitations of email and truly empower your greater audience to create a world with your nonprofit’s vision in mind.
Sarah Henry is the Content Marketing Growth Manager at Elevation Web, a full-service nonprofit web design agency. Sarah began in the nonprofit world in 2009 and has worked with organizations supporting education and digital and performing arts ever since.
Lauren Uhl also works at Elevation Web as a copywriter. Lauren believes writing can change the world, and that’s why she teaches middle-schoolers Language Arts and History through a social justice lens.